
Inkjet Banding: Causes & Fixes
Banding in printing — those repeating light or dark horizontal lines running across an otherwise clean print — is one of the most common issues any inkjet printer eventually runs into, DTF printers included. The good news: it’s almost never a dead printer. It’s a printhead, calibration, or maintenance problem with a specific, findable cause. This guide walks through how to identify which one you’re dealing with and fix it in the right order.
What Does Banding Actually Look Like?
Banding in printing isn’t one single defect — it shows up in a few distinct patterns, and each pattern points to a different cause. Matching your print to one of these before you start adjusting settings saves a lot of wasted troubleshooting time.
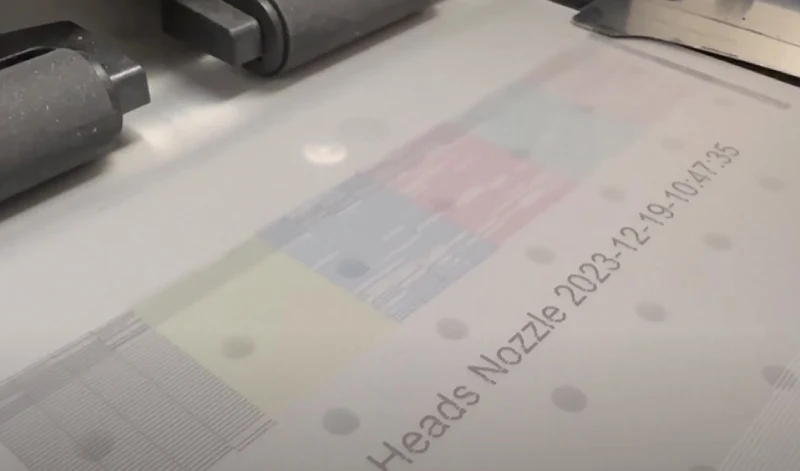
The pattern itself is the diagnostic clue. A single missing line at a fixed position almost always means a nozzle problem. A repeating pattern that shifts with print speed or resolution points toward calibration. And anything that looks fine on the nozzle check but still shows regular stripes in the actual print is very rarely a printhead issue at all — it’s mechanical, usually in how the film is advancing through the machine.
Uniform Fixed Lines
A thin light or dark line at the same position, every pass. Almost always a partially clogged or misfiring nozzle — ink is jetting at the wrong angle or not at all.
“Mowed Lawn” Pattern
Alternating light/dark bands with a directional look, most visible in solid fills. Classic sign of bi-directional print head misalignment between left-to-right and right-to-left passes.
Regular Spaced Stripes
Bands repeating at a consistent interval every few millimeters, nozzle check otherwise clean. This is the signature of a media feed calibration error, not a printhead fault.
Grain or Misty Overspray
Less like clean lines, more like a hazy or grainy texture. Usually points to head height set too high above the film, or static buildup affecting droplet placement.
Work Through These Steps, in Sequence
Troubleshooting banding out of order wastes time — cleaning a printhead that isn’t clogged, or recalibrating feed when the real problem is a dirty encoder strip. Work through these in sequence, cheapest and simplest first, and stop as soon as the banding disappears.
The one part most people forget: The encoder strip doesn’t get attention in most maintenance routines because it’s not an ink-carrying part — but it accumulates ink mist continuously during every print job, and a dirty strip produces banding that looks identical to a feed calibration problem. If you’ve recalibrated feed and alignment and banding persists, check this before assuming something is mechanically broken.
Temperature & Humidity Affect Ink Flow
Even a perfectly calibrated printer can develop banding if the room around it drifts outside a stable range — ink viscosity shifts with both temperature and humidity.
| Condition | Recommended Range |
|---|---|
| Room temperature | 20°C – 30°C (68–86°F) |
| Relative humidity | 40% – 60% RH |
| Humidity danger line | Below 35% RH |
| Direct sunlight / vents | Avoid |
Outside this range, ink doesn’t jet quite as predictably — nozzles that were firing cleanly yesterday can start misfiring today with no other change to the machine. Below 35% humidity specifically, reduced water content thickens the ink and produces uneven deposition, especially across larger solid-fill areas — this is a hard line worth checking with a humidity meter, not just eyeballing the room. If banding appears seasonally, or only on certain days, checking the room conditions before touching printer settings can save a lot of unnecessary recalibration.
DIY Fixes vs. When to Call Support
Most banding resolves with the steps above. A smaller set of cases point to something that shouldn’t be forced through with more cleaning cycles.
- Nozzle checks and standard cleaning cycles
- Bi-directional and feed calibration via software
- Encoder strip cleaning with isopropyl alcohol
- Swapping to verified ink and film brands
- Banding persists after every step above
- Physical damage to the encoder strip itself
- Head height adjustment beyond software settings
- Carriage rail wear or visible mechanical play
Keep a maintenance log: Note the date of each nozzle check, which channel (if any) showed gaps, cleaning cycles run, and when banding appeared or disappeared. A few weeks of this turns “it happens sometimes” into a pattern you can actually see — often pointing straight at humidity swings, a consumable due for replacement, or a specific ink batch.
There’s a real cost to guessing past this point — head height adjustments and carriage-level repairs are exactly where an inexperienced attempt can turn a fixable software issue into an expensive hardware one. If you’ve worked through nozzle check, cleaning, both calibrations, and the encoder strip without resolution, that’s the signal to stop troubleshooting alone and bring in support.
Keep Banding From Coming Back
Most banding traces back to skipped maintenance. See what a proper daily and weekly routine looks like.
Read the Maintenance GuideDowntime costs more than it looks like on paper — see the real numbers with the DTF Printer ROI Calculator.
Banding Questions, Answered
A few more questions people ask once they’ve spotted banding in their prints.