
DTF Shirt Size Chart: The Complete Sizing Guide
Wrong-size DTF transfers are one of the most common (and most avoidable) mistakes in custom apparel — a 10″ logo pressed as a left chest print, or a 4″ design lost in the middle of an adult 2XL. This DTF transfer size guide covers the standard dimensions for every placement, sized correctly for adult, youth, and toddler shirts.
Standard DTF Transfer Sizes by Placement
These are the dimensions most DTF print shops use as a starting point. Sizes refer to the width of the print area — height varies by design, so always check both dimensions against the actual garment before ordering.
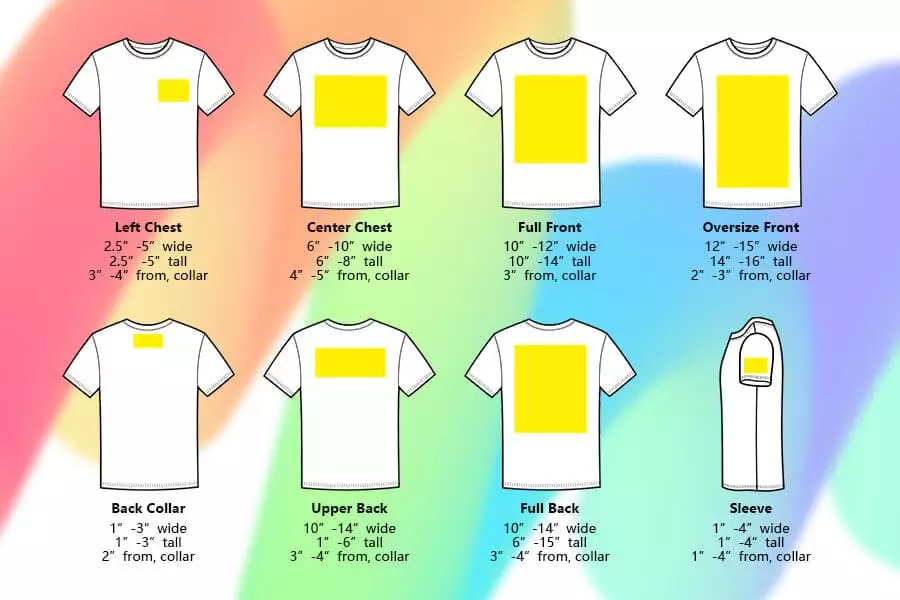
| Placement | Adult Size | Notes |
|---|---|---|
| Full Front / Back | 10″ – 12″ wide | Use 10–11″ for S–M, up to 12″ for L–2XL |
| Left Chest / Pocket Logo | 3.5″ – 4.5″ wide | ~3″ below the collar seam, ~4″ from center |
| Center Chest | 8″ – 10″ wide | Sits higher and smaller than full front |
| Sleeve | 3″ – 3.5″ wide | Keep clear of the seam |
| Hoodie Full Front | ~12″ × 11″ | Sits above the kangaroo pocket |
| Hoodie Full Back | ~12″ × 16″ | Larger canvas than a standard tee |
| Cap Front Panel | 3″ – 4″ wide | Limited by structured panel height |
| Vertical Side Text | ~3″ × 12″ | Popular in streetwear for side slogans or long icons |
How to read this chart: A “10 inch” full front transfer could be 10″×8″, 10″×10″, or 10″×12″ — the width is the constant, height changes with the shape of your design. Always confirm both numbers before sending a file to print.
Measure twice, press once: This chart uses unisex t-shirts as the baseline. Before pressing, double-check your transfer’s dimensions against the actual garment, not just the size on the label — cuts vary between brands, and a design sized for one shirt won’t always sit the same way on another.
Sizing by Adult Garment Size
DTF sizing isn’t one-size-fits-all, even within “adult.” A print that looks balanced on a Small looks undersized on a 2XL, and one that looks bold on an XL can overwhelm a Small. Scale the transfer to the shirt, not the other way around.
| Shirt Size | Recommended Full-Front Width |
|---|---|
| Adult S | 9″ – 10″ |
| Adult M | 10″ – 11″ |
| Adult L | 11″ – 12″ |
| Adult XL | 12″ |
| Adult 2XL | 12″ – 13″ |
| Adult 3XL+ | 13″ |
Youth Shirts
Youth full-front designs typically run 7″–8″ wide, scaling up to 8″–10″ for larger youth sizes. A 10″ print that looks right on an adult tee can wrap under the arms of a youth small.
Toddler & Baby
Keep toddler and baby designs around 5″ wide. Anything larger overwhelms the small canvas and often crosses onto seams or the neckline.
File Resolution
Design at 300 DPI at final print size — a 12″ wide print needs roughly 3,600 pixels of width in the source file to stay sharp after transfer.
Hoodie & sweatshirt adjustment rule: This chart uses standard t-shirts as the baseline. For hoodies and thicker sweatshirts, add about +1″ to front and back design widths so the print stays visible on the bulkier fabric, and +0.5″ to pocket or sleeve placements. Shift front designs slightly downward to clear the hood and drawstrings.
Design Size vs. Print Size vs. Transfer Size
One of the most common points of confusion in DTF sizing is treating these three terms as interchangeable. They’re not, and mixing them up is how orders come out wrong.
| Term | What It Means |
|---|---|
| Design Size | The dimensions of your artwork file — what you create in your design software |
| Print Size | The actual size the design prints at on the PET film, after any scaling in your RIP software |
| Transfer Size | The final size once heat-pressed onto the garment — should match print size exactly if pressed correctly |
In practice: set your design size to match your intended transfer size from the start, working at 300 DPI. This avoids last-minute scaling in RIP software, which can introduce blur or pixelation — especially on text-heavy designs.
Sizing Mistakes That Waste Transfers
The wrong size doesn’t just look unprofessional — it wastes the film, the ink, the blank garment, and the press time. These are the mistakes we see most often.
- Using one fixed size across all garment sizes
- Reusing an adult-size file on youth or toddler shirts
- Pressing over collar ribbing, cuffs, or waistbands
- Placing a full-front size in a left-chest position
- Scaling up a low-resolution file to hit target width
- Scale transfer size to each garment size ordered
- Keep separate youth and toddler size presets
- Avoid stretchy zones — they crack and peel prints early
- Match placement type to its correct size range
- Design at 300 DPI, at true final print size
DTF Transfer Size Guide — Quick Reference
Does Your Printer Cover These Sizes?
Every size chart assumes your printer can actually produce the transfer in one pass. Your printer’s maximum print width is the real ceiling — go over it, and you’re splitting designs across two prints and two press cycles.
HueDrift’s A3+ printers support a print area of roughly 13″ × 19″ — wide enough to cover every size in the chart above, including the largest adult full-back design (12″×16″) and oversized hoodie graphics, in a single pass with no splitting or realignment needed.
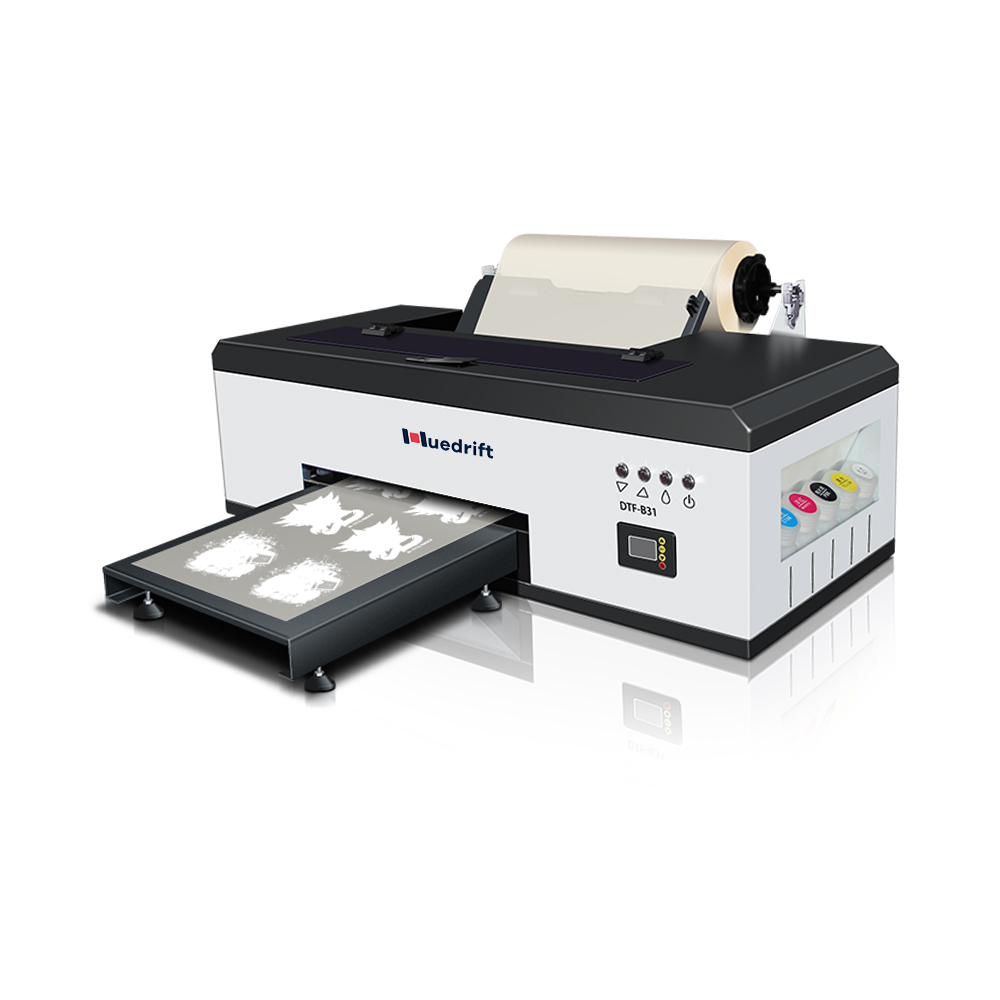
HueDrift One
Entry-level A3+ printer, full 13×19 support for beginners and small studios.
View Printer →
HueDrift Pro
Faster output at the same full print size, for growing order volumes.
View Printer →
HueDrift Pro Max
Dual printhead, slightly larger max area, built for high-volume shops.
View Printer →Sizing for Bags, Accessories, and Non-Flat Items
Once you’re comfortable sizing shirts, the same flat-surface logic extends to other flat accessories — just with different reference numbers. Cylindrical items are a different story entirely.
Flat Accessories (Same Logic, Different Numbers)
Tote bags and duffle bags are still flat surfaces, so the same “measure the placement area, size the design to fit” approach from this chart still applies. As a starting point, duffle bags typically take a 5″–8″ wide design depending on bag size, and tote bags scale similarly to a t-shirt center-chest print. Always measure the actual flat area before pressing, and keep the design clear of seams, zippers, and handles — those spots won’t take heat evenly and are a common cause of peeling.
Every size in this chart assumes a flat garment surface — a shirt, hoodie, or cap panel laid open under the printhead. That logic breaks down completely once the item is a tube instead of a flat surface.
Why socks need a different approach: A flat DTF transfer film can’t wrap cleanly around a cylindrical sock without gaps, seams, or dead zones at the edges. Socks — along with arm sleeves and wristbands — need a printer built around that shape, not a flat-bed size chart.
Get Sizing Right, Every Order
Save this chart, or download the printer that covers every size on it in a single pass.
Explore HueDrift DTF PrintersCurious about your margins at scale? Try the DTF Printer ROI Calculator.
DTF Sizing Questions, Answered
A few more questions we hear often about DTF transfer sizing.